The clock is ticking, the guests are arriving in an hour, and your homemade buttercream looks less like a smooth professional finish and more like a textured plaster wall. We have all stood in that kitchen, grip-squeezing a piping bag with sweaty palms, wondering how a simple birthday celebration turned into a high-stakes pastry test. The good news is you do not need to master pastry-school smoothing techniques to deliver a show-stopping cake. By leaning into clever optical illusions, colorful pantry staples, and everyday household items, you can completely mask uneven icing and create a whimsical, photogenic centerpiece that looks entirely intentional.
The Toy-Parade Birthday Hat Pageant
Best for: Animal lovers and parents looking to reuse existing toys.
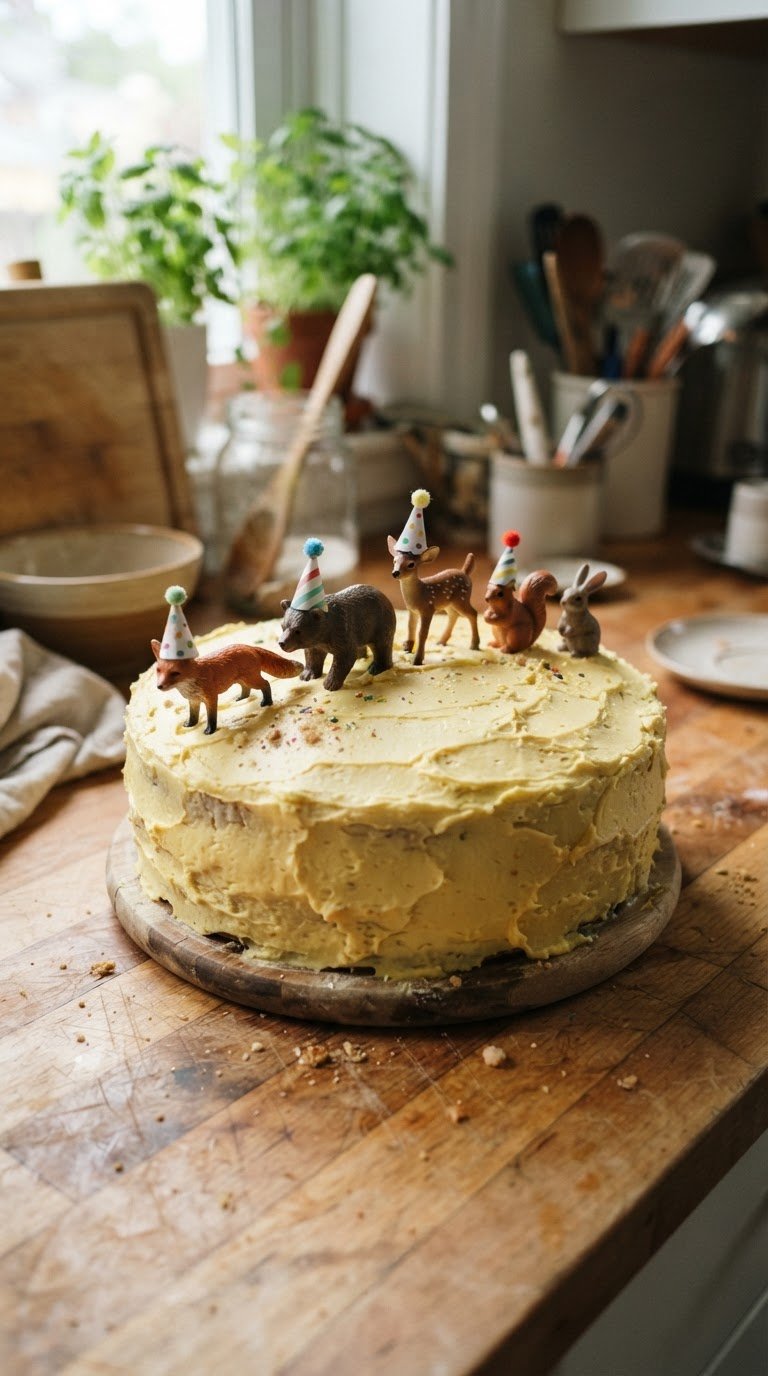
This design completely bypasses the need for smooth icing by drawing the eye to a joyful, miniature parade marching right across the top of your cake. By gathering a few plastic toy animals from the playroom and washing them thoroughly, you create an instant, whimsical focal point. The real magic happens when you outfit each creature with its own tiny, handmade paper party hat.
When we tried this for a last-minute family gathering, the base cake was a rushed, crumb-filled chocolate mess. Once the parade of toy giraffes, bears, and dinosaurs was arranged in a swirling line across the top, the rough frosting suddenly looked like a rugged, natural landscape. The guests spent the entire party photographing the tiny paper hats rather than inspecting the buttercream.
To make the hats, simply cut small semi-circles of colorful construction paper, roll them into cones, secure them with a dot of hot glue, and top them with micro-pompoms. Anchor the animals gently into the frosting so they do not tip over during the singing.
💡 Pro Tip: Use a tiny dab of melted chocolate on the bottom of the toy paws to secure them to the cake board if they feel top-heavy.
The Gummy Bear Cascade Grid
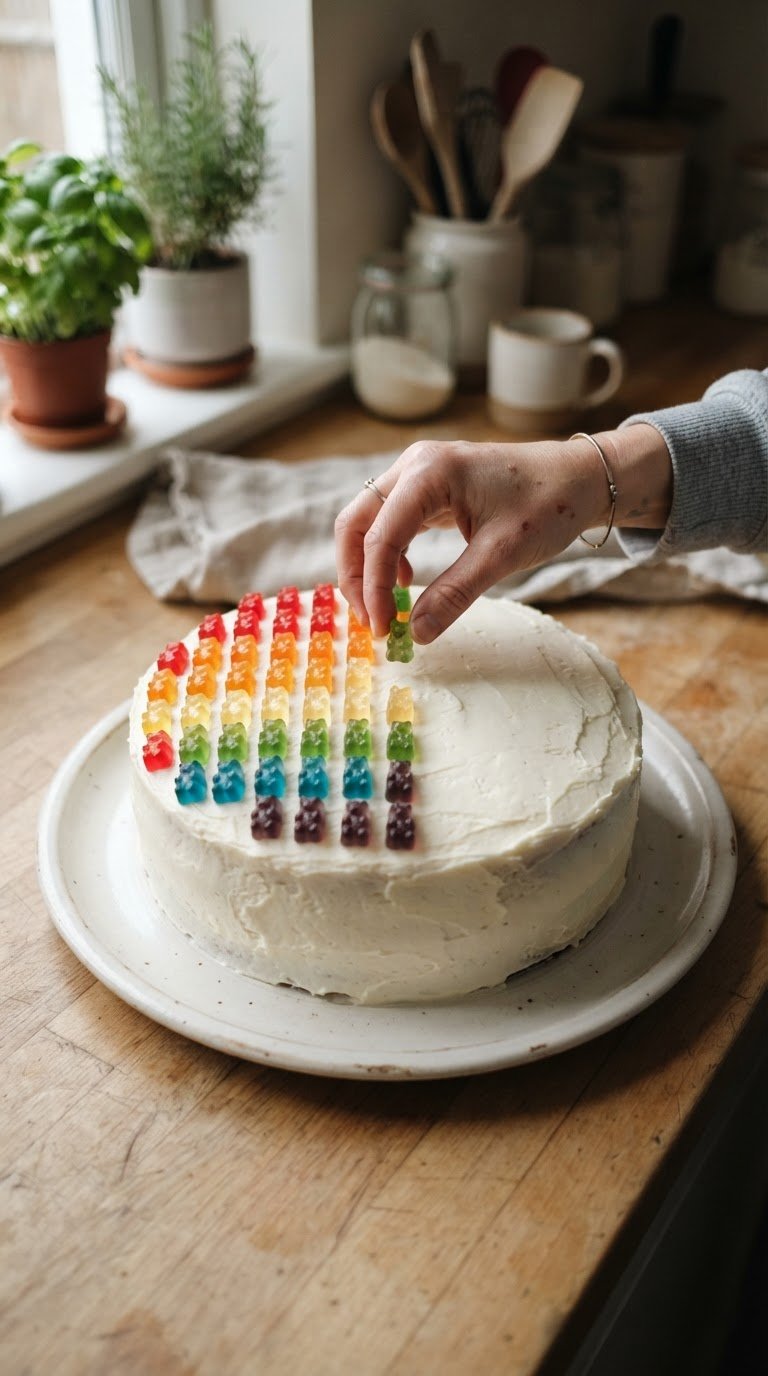
Gummy bears are a secret weapon for hiding clumsy frosting jobs because their translucent, gem-like colors naturally bounce light away from imperfections. Instead of scattering them randomly, arranging them in a tight, geometric grid or an ombre cascade creates an incredibly neat, modern aesthetic with zero piping skills required.
You can cover the entire side of a cake or let them cascade down from the top edge in color-blocked columns. The natural stickiness of the gummy candies helps them adhere instantly to any crusting buttercream or cream cheese frosting without sliding.
This method works best when you buy a couple of extra bags so you can sort the candies by color beforehand. The sheer density of the candy grid means your frosting serves as mere glue rather than a visual element.
How to Plan It
- Sort your gummy bears by color into small bowls before starting.
- Lightly mark straight vertical guide lines in your frosting using a toothpick.
- Press each candy gently but firmly into the side of the cake, working from the bottom up.
- Keep the cake chilled until serving to prevent the weight of the candies from pulling down warm frosting.
Planning note: Budget about 15 minutes of assembly time specifically for sorting and placing the candies.
The Biscuit-Stick Picket Fence
Best for: Bakers who struggle with keeping crumb coats clean.
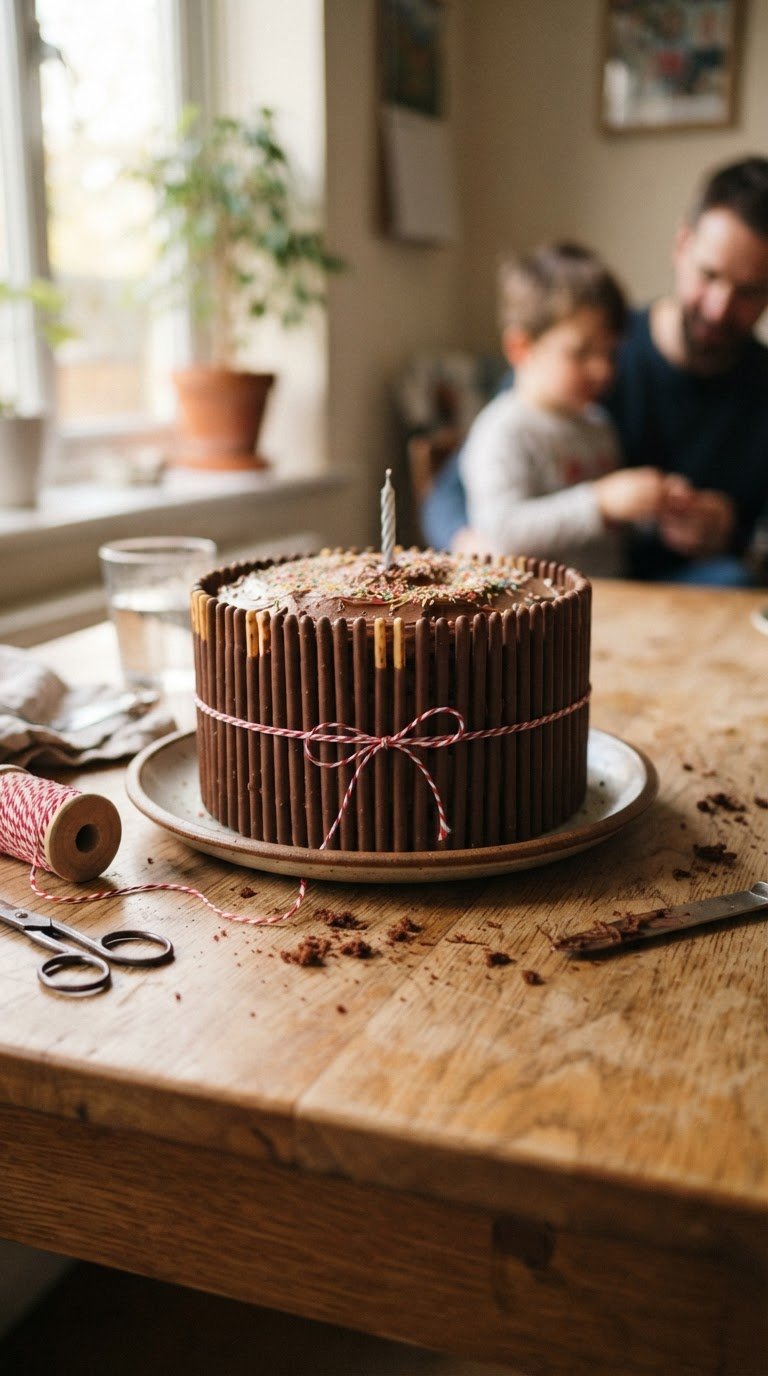
If the sides of your cake look lumpy or have stubborn crumbs showing through, the easiest solution is to wall them off entirely. Chocolate-dipped biscuit sticks or thin wafer cookies can be lined up shoulder-to-shoulder around the perimeter, creating a charming picket fence that hides every single side-wall flaw.
This decorator hack turns a potential disaster into a structural design element that adds a delightful crunch to every slice. It completely eliminates the need to smooth out the sides of your cake, meaning you only have to worry about making the very top flat.
Once the biscuit sticks are pressed into the frosting side-by-side, wrap a piece of simple cotton twine or colorful baker’s ribbon around the center of the cake. This not only keeps the sticks securely in place but also adds a rustic, gift-wrapped appearance.
Budget Priorities
- 2 boxes of chocolate-dipped biscuit sticks: $6.00
- 1 roll of natural cotton baker’s twine: $2.50
- Assorted colorful sprinkles for the top surface: $3.00
- Total decorating cost: Under $12.00
💡 Pro Tip: Measure the height of your cake before buying the biscuit sticks; if the sticks are too tall, you can easily trim the un-dipped ends with a sharp knife.
The Pressed Botanical Flower-Patch Slab
Best for: Spring outdoor gatherings and garden-themed birthday parties.
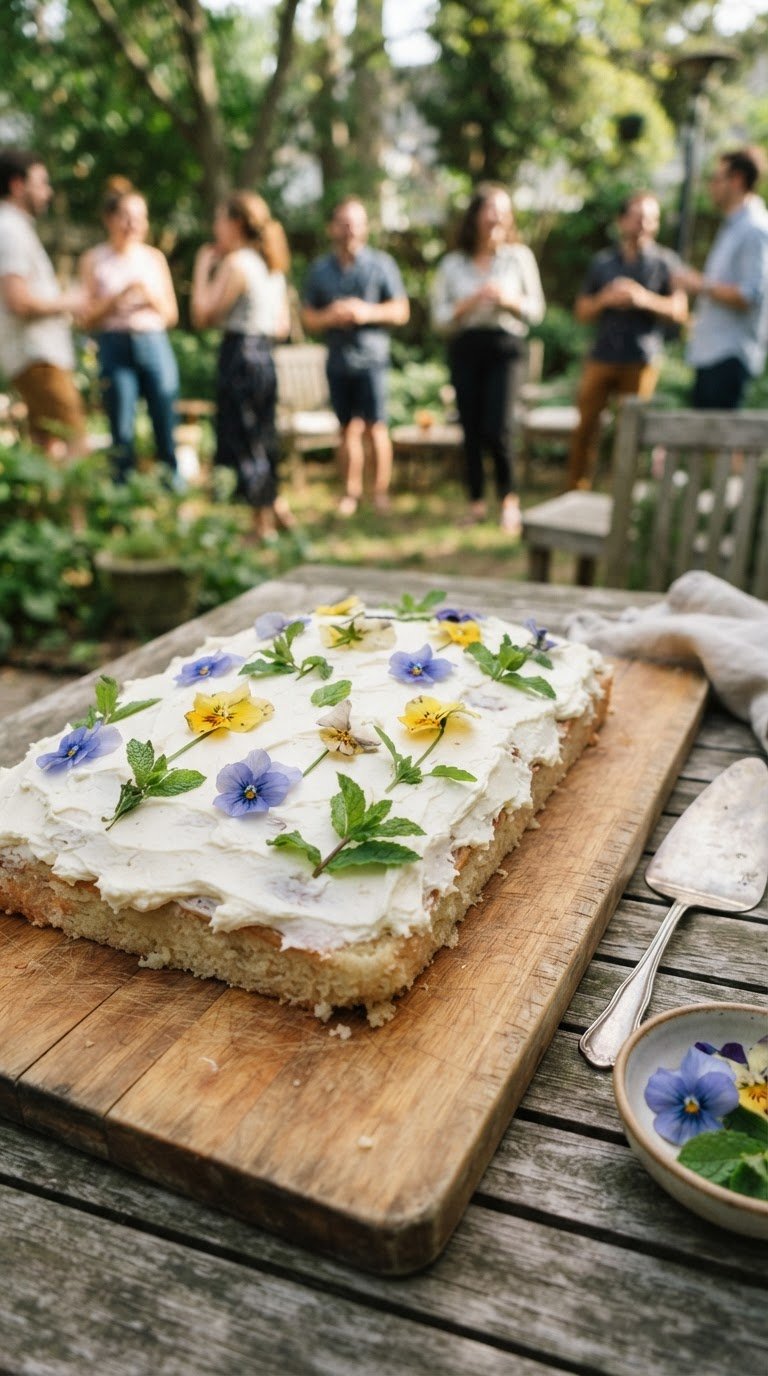
For an elegant, cottagecore aesthetic that takes under five minutes to assemble, look no further than edible flowers. Spreading a simple sheet cake with a rustic, swirl-heavy layer of icing provides the perfect canvas for a whimsical wildflower meadow.
Rather than fussing over straight edges, let the natural imperfections of the frosting mimic the gentle hills of a garden. Gently pressing vibrant, edible blossoms flat into the surface instantly transforms the cake into a piece of botanical art. It is sophisticated, effortless, and incredibly photogenic under natural light.
This approach is particularly forgiving because the flowers look best when scattered organically, rather than in rigid, formal patterns. You can use pansies, violas, borage, or chamomile to bring bursts of natural color to a plain white or pastel background.
Planning note: Ensure flowers are sourced from an organic, pesticide-free grower specifically labeled for culinary use.
The Translucent Lollipop Wonderland
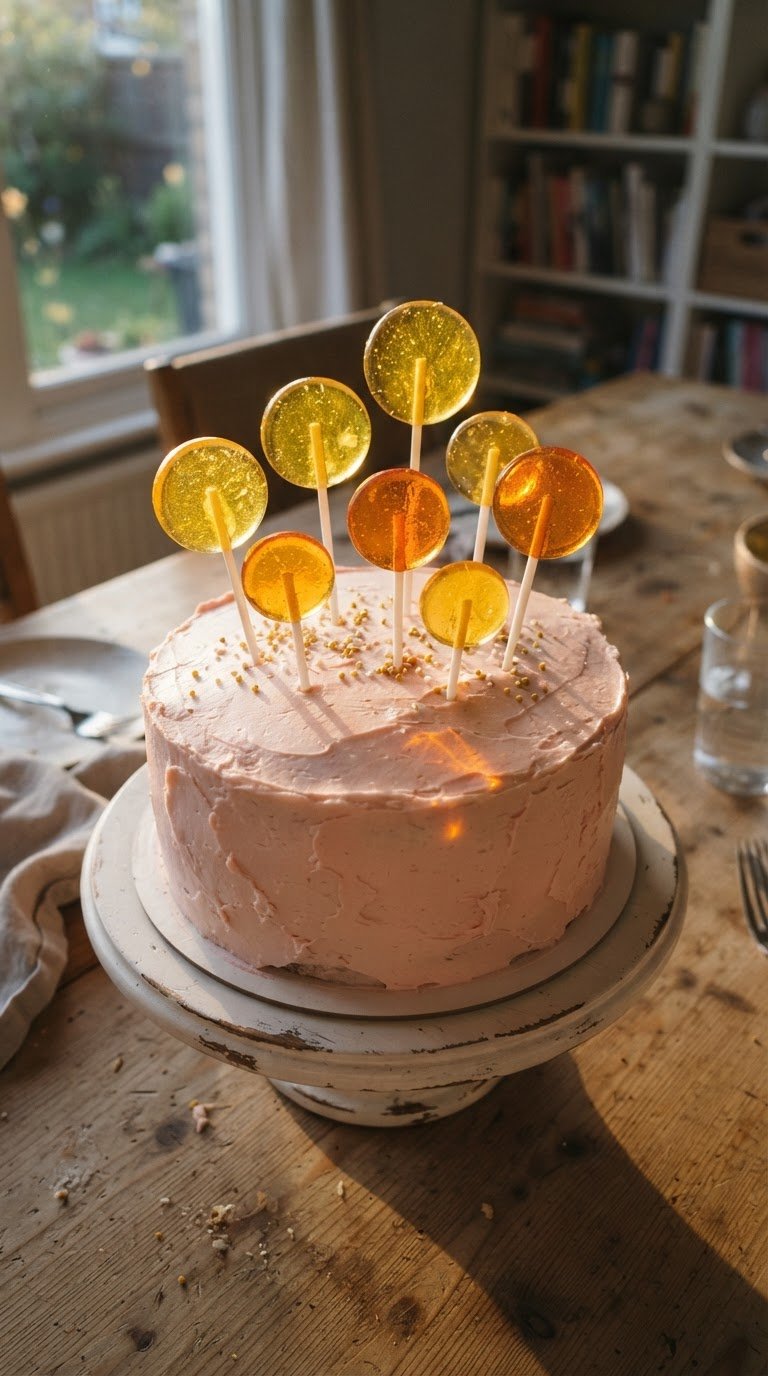
Transform the top of a simple cake into a whimsical, glass-like forest by utilizing the heights and transparency of classic lollipops. By unwrapping a variety of colorful, clear lollipops and inserting them at staggered depths, you create a beautiful sense of dimension and playfulness.
When light passes through the transparent candy heads, it projects colorful, stained-glass reflections onto the frosting below. This technique is wonderful for adding height and drama to small-diameter cakes without requiring any structural dowels or complex cake sculpting.
Choose lollipops in a cohesive color palette, such as warm ambers and pinks, or cool blues and greens, to keep the design looking intentional and modern rather than chaotic.
Planning Checklist
- Purchase 8 to 10 clear, translucent lollipops in varying sizes.
- Unwrap candies carefully to avoid leaving fingerprint smudges on the smooth surfaces.
- Trim the plastic sticks to varying lengths using kitchen shears to create layers of height.
- Insert the tallest lollipops toward the back and shorter ones toward the front.
- Add a light dust of sparkling sanding sugar around the base of the sticks for a magical finish.
💡 Pro Tip: If the lollipops are sticky or cloudy out of the wrapper, run them quickly under a tiny stream of cold water and let them air dry to restore their glass-like shine.
The Cookie-Cutter Sprinkle Embossing
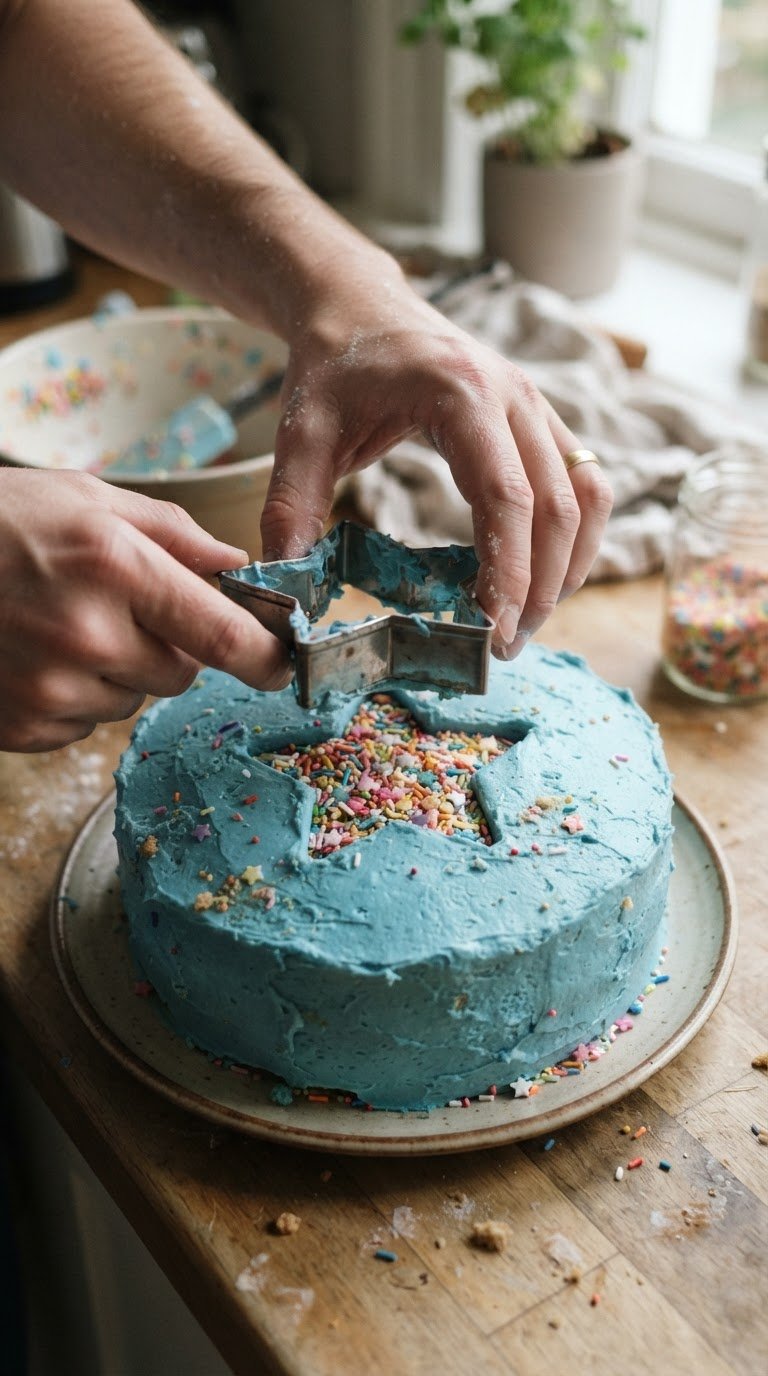
Getting clean, sharp shapes with sprinkles can feel impossible when freehanding, but a standard metal cookie cutter solves this problem instantly. By gently pressing a cookie cutter a fraction of an inch into the chilled frosting, you create a perfect metal wall that holds your sprinkles exactly where you want them.
This simple embossing trick allows you to make crisp stars, hearts, initials, or age numbers right in the center of the cake. The metal frame prevents stray sprinkles from rolling away, ensuring your lines remain perfectly sharp and clean.
Once the shapes are filled, you simply lift the cutter straight up to reveal a flawless, raised sprinkle design that looks like it took hours of painstaking placement.
How to Plan It
- Chill the frosted cake for at least 30 minutes so the surface is firm.
- Gently press a metal cookie cutter about an eighth of an inch into the frosting.
- Carefully spoon sprinkles inside the cutter boundaries, pressing them down lightly with the back of a spoon.
- Blow away any stray sprinkles outside the cutter using a clean straw.
- Slowly lift the cookie cutter straight up to preserve the sharp edges.
The Washi-Tape Bunting Canopy
Best for: Crafty hosts who love paper goods and scrapbooking details.
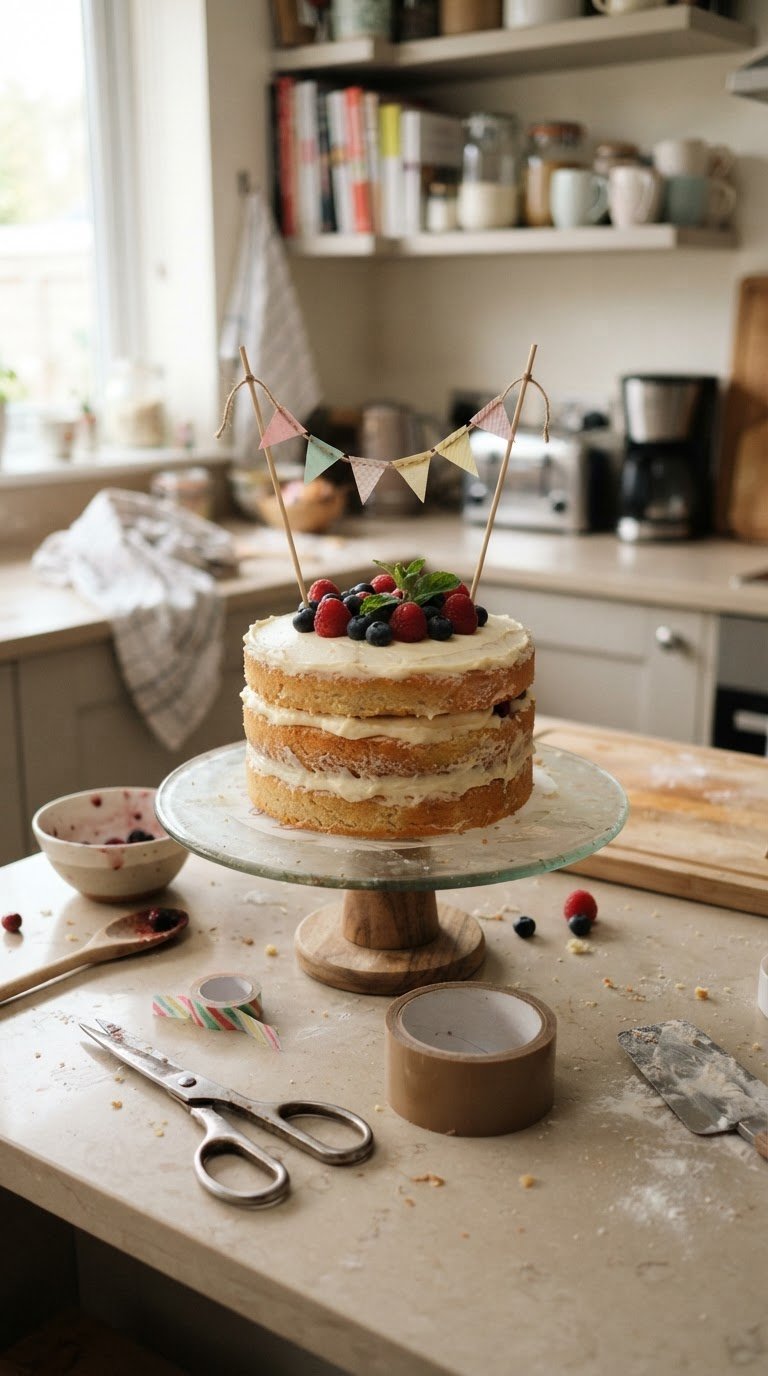
When the top of your cake looks barren or uneven, building upward is a brilliant way to distract the eye. A homemade, miniature bunting canopy strung between two wooden skewers adds immediate height, color, and festive charm for pennies.
By folding colorful patterns of washi tape over baker’s twine, you can create a custom pennant banner in minutes. The angled flags draw the gaze up toward the air, making the actual cake surface feel like a supporting stage rather than the main event.
This project is highly customizable to match any party color scheme and requires absolutely no kitchen skills, making it a perfect activity to delegate to kids or helpful family members while the cake cools.
Budget Priorities
- Two bamboo kitchen skewers: $0.10
- A small length of kitchen twine: $0.05
- Three rolls of patterned washi tape: $4.00
- Total cost for this towering, customizable topper: $4.15
Planning note: Assemble the bunting banner flat on a table first, then tie it to the skewers before inserting them into the cake.
The Gravity-Defying Dropped Soft Serve
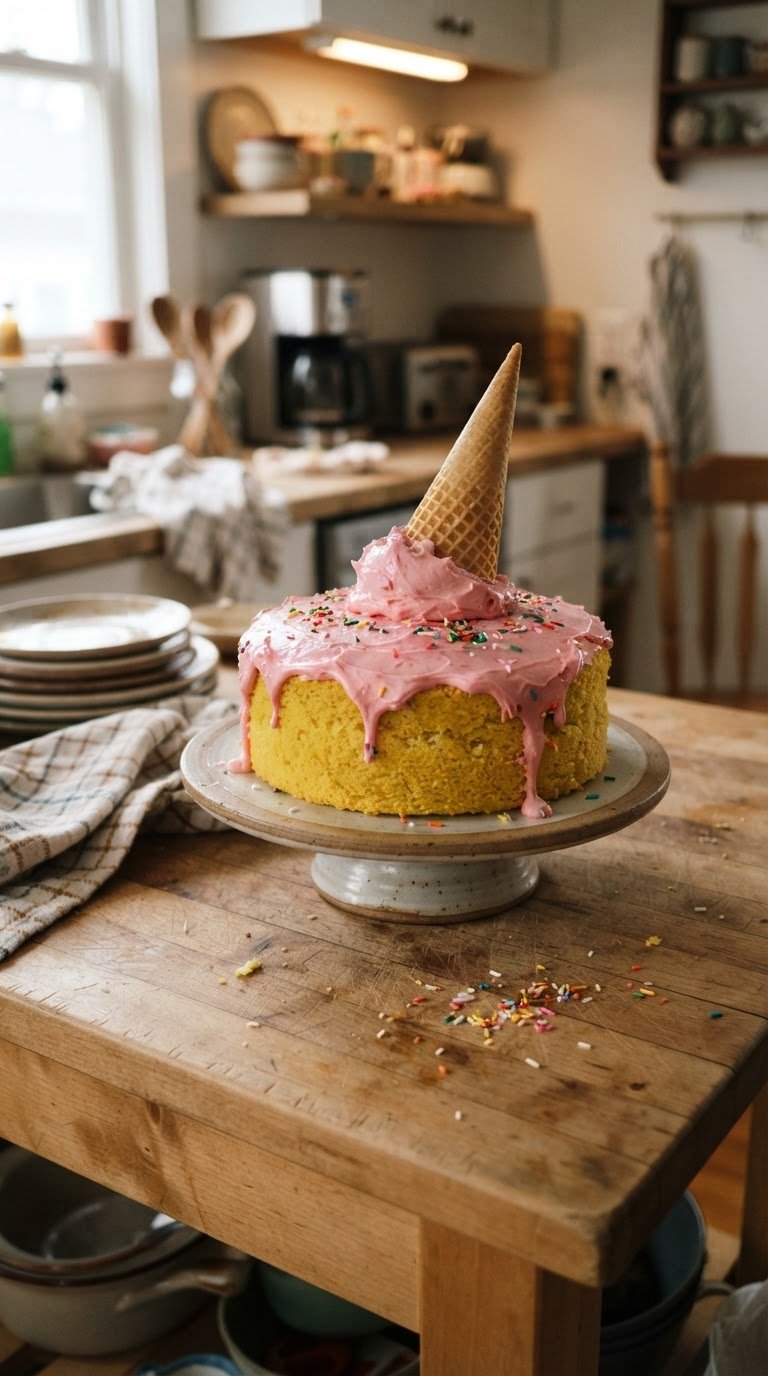
Embrace the beauty of a happy accident with a playful, upside-down ice cream cone design. This cheeky look turns a messy drip cake into a humorous, gravity-defying sculpture that will have guests smiling the second they see it.
To pull this off, you place a single round scoop of firm frosting or a leftover cupcake directly in the center of your cake to act as the dropped scoop of ice cream. Pour a vibrant, warm chocolate or colored white-chocolate ganache over the top of the scoop, letting it pool naturally and drip down the sides of the cake.
Finishing the look is as simple as pressing a real waffle cone upside down onto the mound. The result looks incredibly professional, yet its entire charm relies on messy, organic drips that require absolutely no precision.
💡 Pro Tip: Use a squeeze bottle to apply the drip ganache around the edges first for ultimate control over where the drips fall.
The Retro Cereal Ring Mosaic
Best for: First birthday parties and nostalgic retro gatherings.
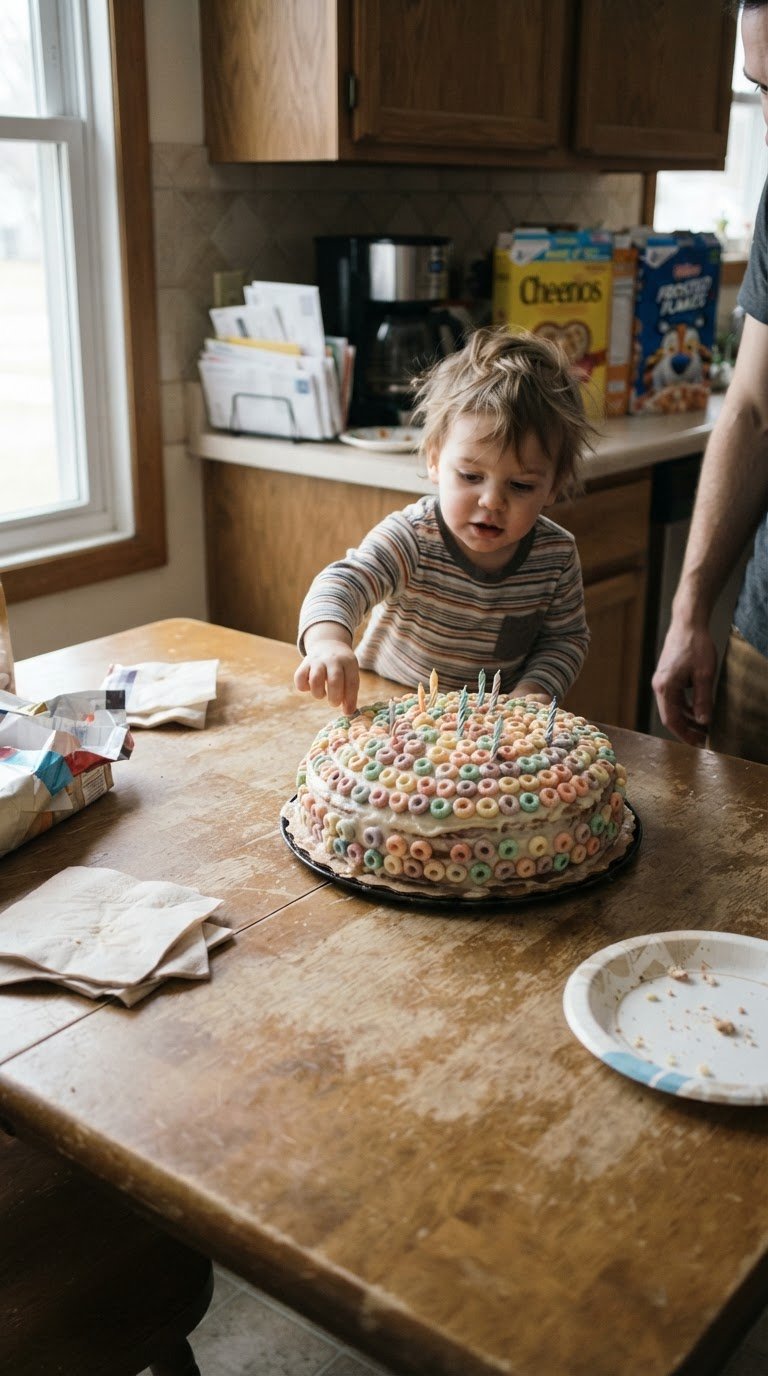
Puffed cereal rings are not just for breakfast; their uniform shapes and nostalgic pastel colors make them an incredible medium for mosaic-style cake decorating. By pressing these crunchy loops into your frosting, you can build beautiful patterns that cover up a multitude of icing sins.
Whether you arrange them in concentric circles on top or line them up in repeating color bands around the sides, the texture is wonderfully vintage and playful. The repeating circular shapes naturally create a clean, organized pattern that hides any bumps in the underlying cream.
This style is particularly popular for toddler birthdays, as the cereal is easy for little fingers to pluck off and eat, adding a fun, interactive element to the dessert table.
Planning note: Apply the cereal rings within an hour of serving to ensure they stay perfectly crisp and do not absorb moisture from the frosting.
The Paper-Cutout Dusting Stencil
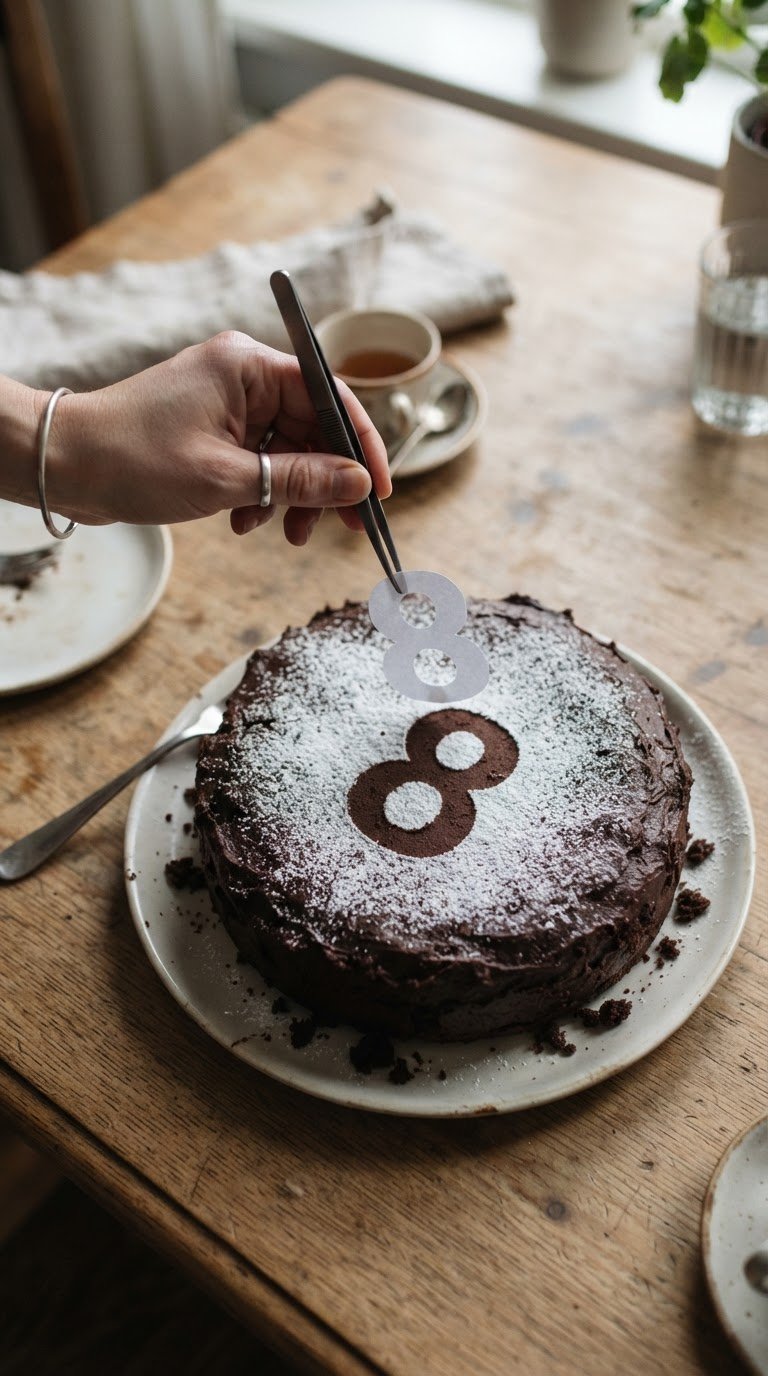
Perhaps the oldest and most reliable baking shortcut of all is the simple paper stencil. If you can cut a shape out of paper, you can decorate a cake in seconds using nothing more than a fine mesh sieve and some powdered sugar or cocoa powder.
By placing a clean, paper-cut silhouette—such as a large number, a star, or a botanical leaf—directly onto a plain, un-iced or simply frosted cake, you create a temporary shield. Dusting the top heavily with sugar or cocoa and then carefully lifting the paper reveals a stunning, crisp negative image.
This method is completely foolproof because if you make a mistake, you can simply smooth the top with a knife and dust it again. It provides a clean, elegant, and flat graphic look that is impossible to achieve with a piping bag.
Planning Checklist
- Cut your desired shape or number out of heavy cardstock to prevent the edges from curling.
- Ensure the top of your cake is completely cool and dry to prevent the sugar from melting.
- Hold the stencil close to the surface, or lay it down very gently without pressing.
- Use a fine-mesh tea strainer to dust a light, even layer of powdered sugar or cocoa.
- Lift the stencil straight up using tweezers or a piece of tape stuck to the center as a handle.
When it comes to celebrating, the energy you bring to the table matters far more than the straightness of your cake’s sides. If you do find yourself facing a last-minute frosting smudge or a transport slip-up on your way to the venue, remember the golden rule of home baking: always pack a small emergency container of your primary topping. A strategic cluster of extra gummy bears, a carefully placed toy animal, or an extra sprinkle of cereal can instantly camouflage any on-site transit damage. Embrace the minor imperfections, lean into the whimsical design hacks, and enjoy the party knowing you bypassed the stress of pastry perfection.